I am following the youtube video React Portfolio Website Tutorial From Scratch – Build & Deploy React JS Portfolio Website (2022) by EGATOR. Thanks to him!
I am using Windows10 and vscode to build this.
1. Prerequisites
- vscode installed
- Nodejs/NVM installed
- How to Build Portfolio Website with React-Part1
- How to Build Portfolio Website with React-Part2
2. Add contents on Header
- Create CTA.jsx file under Header folder.
Type “rafce” to write the basic code, import the resume/cv file, and make a button to download and button to go to contact page. Here is the code done.
import React from 'react'
import Resume from '../../assets/Resume.pdf'

const CTA = () => {
  return (
	<div className='resume'>
		<a href={Resume} download className='btn'>Download Resume</a>
		<a href="#contact" className='btn btn-primary'>Contact Me</a>
	</div>
  )
}

export default CTA- Create HeaderSocials.jsx file under Header folder.
Type “rafce” to write the basic code, install react icons, choose and import icons you want, and use a tag to link them. Here is the code done.
import React from 'react'
import {BsLinkedin} from 'react-icons/bs'
import {FaGithub} from 'react-icons/fa'
import {BsFacebook} from 'react-icons/bs'

const HeaderSocials = () => {
  return (
	<div className='header__socials'>
		<a href="https://linkedin.com" target="_blank"><BsLinkedin/></a>
		<a href="https://github.com" target="_blank"><FaGithub/></a>
		<a href="https://facebook.com" target="_blank"><BsFacebook/></a>
	</div>
  )
}

export default HeaderSocials- Go to Header.jsx file under Header folder.
import CTA, HeaderSocials files just created and also your picture, and add contents whatever you want. Here is the code done.
import React from 'react'
import './header.css'
import CTA from './CTA'
import ME from '../../assets/me.png'
import HeaderSocials from './HeaderSocials'

const header = () => {
  return (
	<header>
		<div className="container header__container">
			<h5>Hello I'm</h5>
			<h1>Jisoo Oh</h1>
			<h5 className="text-light">Software Developer & Data Analyst</h5>
			<CTA />
			<HeaderSocials />

			<div className="me">
				<img src={ME} alt="me" />
			</div>

			<a href="#contact" className='scroll__down'>Contact Me</a>
		</div>
	</header>
  )
}

export default header
3. Styling Header
This is all about css. I am not explaining anything about this, but just leave the code below.
If you want the explanations, watch his video from 56 min.
header {
	height: 100vh;
	padding-top: 7rem;
	overflow: hidden;
}

.header__container {
	text-align: center;
	height: 100%;
	position: relative;
}

/* Resume */
.resume{
	margin-top: 2.5rem;
	display: flex;
	gap: 1.2rem;
	justify-content: center;
}

/* Header Socials */
.header__socials {
	display: flex;
	flex-direction: column;
	align-items: center;
	gap: 0.8rem;
	position: absolute;
	left: 0;
	bottom: 3rem;
}

.header__socials::after {
	content: "";
	width: 1px;
	height: 2rem;
	background: var(--color-primary);
}

/* ME */
.me {
	background: linear-gradient(var(--color-primary), transparent);
	width: 22rem;
	height: 30rem;
	position: absolute;
	left: calc(50% - 11rem);
	margin-top: 4rem;
	border-radius: 12rem 12rem 0 0;
	overflow: hidden;
	padding: 5rem 1.5rem 1.5rem 1.5rem;
}

/* Scroll Down */
.scroll__down {
	position: absolute;
	right: -2.3rem;
	bottom: 5rem;
	transform: rotate(90deg);
	font-weight: 300;
	font-size: 0.9rem;
}

/* MEDIA QUERIES (MEDIUM DEVICES) */
@media screen and (max-width:1024px) {
	header {
		height: 68vh;
	}
}

/* MEDIA QUERIES (SMALL DEVICES) */
@media screen and (max-width:600px) {
	header {
		height: 100vh;
	}

	.header__socials,
	.scroll__down {
		display: none;
	}
}
4. Add contents on Nav
To check jumping to the each section when clicking the nav buttons,
- add
height: 100vh;to section tag in the general style (index.css line 65). - add section tag and id to each components except footer, header, and nav(you can add if you want).


Now, import react-icons and add a tag to link all sections.
import React from 'react'
import './nav.css'
import {AiOutlineHome} from 'react-icons/ai'
import {AiOutlineUser} from 'react-icons/ai'
import {BiBook} from 'react-icons/bi'
import {RiServiceLine} from 'react-icons/ri'
import {BiMessageSquareDetail} from 'react-icons/bi'

const Nav = () => {
  return (
		<nav>
			<a href="#"><AiOutlineHome/></a>
			<a href="#about"><AiOutlineUser/></a>
			<a href="#experience"><BiBook/></a>
			<a href="#services"><RiServiceLine/></a>
			<a href="#contact"><BiMessageSquareDetail/></a>
		</nav>
  )
}

export default Nav
5. Styling Nav
This is all about css. I am not explaining anything about this, but just leave the code below.
If you want the explanations, watch his video from 1:14.
nav {
	background: rgba(0, 0, 0, 0.3);
	width: max-content;
	display: block;
	padding: 0.7rem 1.7rem;
	z-index: 2;
	position: fixed;
	left: 50%;
	transform: translateX(-50%);
	bottom: 2rem;
	display: flex;
	gap: 0.8rem;
	border-radius: 3rem;
	backdrop-filter: blur(15px);
}

nav a {
	background: transparent;
	padding: 0.9rem;
	border-radius: 50%;
	display: flex;
	color: var(--color-light);
	font-size: 1.1rem;
}

nav a:hover {
	background:rgba(0, 0, 0, 0.3);

}

nav a:active {
	background: var(--color-bg);
	color: var(--color-white);
}
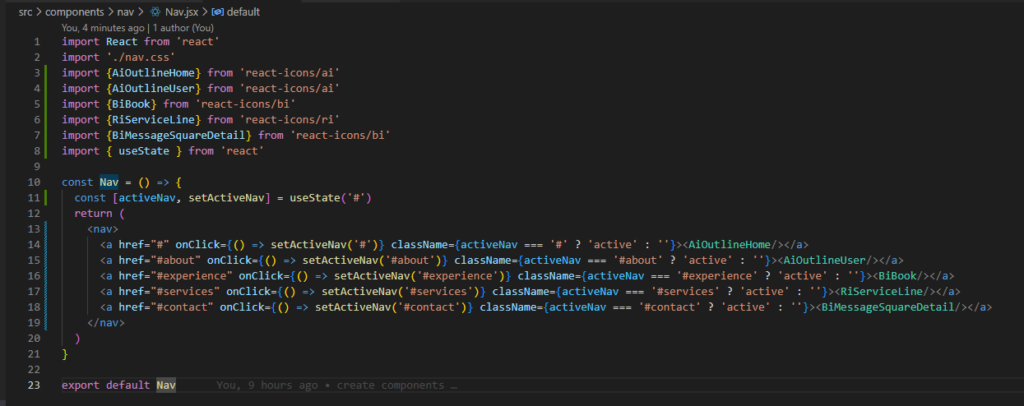
To show active nav button, it is using react useState Hook.
- import useState from react
- add onClick function and className

Here is the full code of Nav.jsx.
import React from 'react'
import './nav.css'
import {AiOutlineHome} from 'react-icons/ai'
import {AiOutlineUser} from 'react-icons/ai'
import {BiBook} from 'react-icons/bi'
import {RiServiceLine} from 'react-icons/ri'
import {BiMessageSquareDetail} from 'react-icons/bi'
import { useState } from 'react'

const Nav = () => {
	const [activeNav, setActiveNav] = useState('#')
  return (
		<nav>
			<a href="#" onClick={() => setActiveNav('#')} className={activeNav === '#' ? 'active' : ''}><AiOutlineHome/></a>
			<a href="#about" onClick={() => setActiveNav('#about')} className={activeNav === '#about' ? 'active' : ''}><AiOutlineUser/></a>
			<a href="#experience" onClick={() => setActiveNav('#experience')} className={activeNav === '#experience' ? 'active' : ''}><BiBook/></a>
			<a href="#services" onClick={() => setActiveNav('#services')} className={activeNav === '#services' ? 'active' : ''}><RiServiceLine/></a>
			<a href="#contact" onClick={() => setActiveNav('#contact')} className={activeNav === '#contact' ? 'active' : ''}><BiMessageSquareDetail/></a>
		</nav>
  )
}

export default Nav
6. Add contents on About
- import the image and react-icons and add the contents.
- This is just about the html, and just repeating above, so I don’t explain things. If you still want the explanations, watch his video from 1:22.
import React from 'react'
import './about.css'
import AboutMe from '../../assets/about_me.png'
import { FaAward } from 'react-icons/fa'
import { FiUsers } from 'react-icons/fi'
import { VscFolderLibrary } from 'react-icons/vsc'


const About = () => {
  return (
		<section id='about'>
			<h5>Get To Know</h5>
			<h2>About Me</h2>

			<div className="container about__container">
				<div className="about__me">
					<div className="about__me-image">
						<img src={AboutMe} alt="About Image" />
					</div>
				</div>

				<div className="about__content">
					<div className="about__cards">
						<article className="about__card">
							<FaAward className='about__icon'/>
							<h5>Experience</h5>
							<small>3+ Years Working</small>
						</article>

						<article className="about__card">
							<FiUsers className='about__icon'/>
							<h5>Clients</h5>
							<small>200+ Worldwide</small>
						</article>

						<article className="about__card">
							<VscFolderLibrary className='about__icon'/>
							<h5>Projects</h5>
							<small>80+ Completed</small>
						</article>
					</div>

					<p>
						Lorem ipsum dolor sit amet consectetur adipisicing elit. Officia labore dicta officiis, porro cupiditate enim vitae asperiores maiores consequatur tempora eum dolorem quibusdam reprehenderit exercitationem accusamus iste atque facere! Eos.
					</p>

					<a href="#contact" className='btn btn-primary'>Let's Talk</a>
				</div>
			</div>
		</section>
  )
}

export default About
5. Styling Nav
This is all about css. I am not explaining anything about this, but just leave the code below.
If you want the explanations, watch his video from 1:28.
.about__container {
	display: grid;
	grid-template-columns: 35% 50%;
	gap: 15%;
}

.about__me {
	width: 100%;
	aspect-ratio: 1/1;
	border-radius: 2rem;
	background: linear-gradient(
		45deg,
		transparent,
		var(--color-primary),
		transparent
	);
	display: grid;
	place-items: center;
}

.about__me-image {
	border-radius: 2rem;
	overflow: hidden;
	transform: rotate(10deg);
	transition: var(--transition);
}

.about__me-image:hover {
	transform: rotate(0);
}

.about__cards {
	display: grid;
	grid-template-columns: repeat(3, 1fr);
	gap: 1.5rem;
}

.about__card {
	background: var(--color-bg-variant);
	border: 1px solid transparent;
	border-radius: 1rem;
	padding: 2rem;
	text-align: center;
	transition: var(--transition);
}

.about__card:hover {
	background: transparent;
	border-color: var(--color-primary-variant);
	cursor: default;
}

.about__icon {
	color: var(--color-primary);
	font-size: 1.4rem;
	margin-bottom: 1rem;
}

.about__card h5 {
	font-size: 0.95rem;
}

.about__card h5 {
	font-size: 0.7rem;
	color: var(--color-light);
}

.about__content p {
	margin: 2rem 0 2.6rem;
	color: var(--color-light);
}


/* MEDIA QUERIES (MEDIUM DEVICES) */
@media screen and (max-width:1024px) {
	.about__container {
		grid-template-columns: 1fr;
		gap: 0;
	}

	.about__me {
		width: 50%;
		margin: 2rem auto 4rem;
	}

	.about__content p {
		margin: 1rem 0 1.5rem;
	}
}

/* MEDIA QUERIES (SMALL DEVICES) */
@media screen and (max-width:600px) {
	.about__me {
		width: 65%;
		margin: 0 auto 3rem;
	}

	.about__cards {
		grid-template-columns: 1fr 1fr;
		gap: 1rem;
	}

	.about__content {
		text-align: center;
	}

	.about__content p {
		margin: 1.5rem 0;
	}
}
Done for this post and will do edit each component on next post.


