This post is for myself to remember how to start the basic Django project. I did follow the tutorial from the JustDjango Learn website free tutorial. And this is the first tutorial named Django Crash Course. While the tutorial was on MacOS with VSCode using terminal bash, I was following this on Windows with VSCode using Windows PowerShell for the terminal. All my explanation would be on WindowsOS.
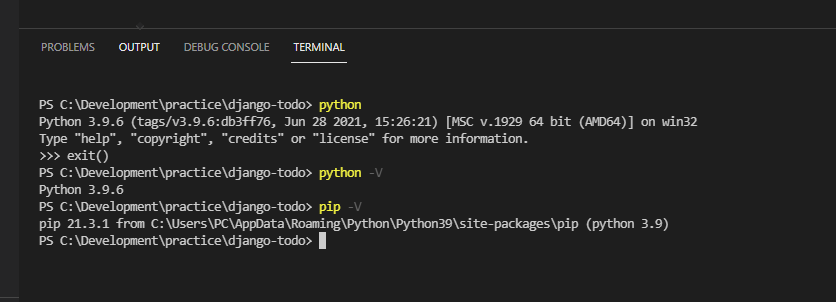
Python 3.6 or above needs to be installed. In the JustDjango Learn, he used 3.7.4, and I used 3.9.6. To check your Python version, – click start(windows logo on your computer) or hit windows logo key on your keyboard. – type cmd or terminal to open your command line. – If you want to do in VSCode, open your terminal by hit ctrl+` key, or click view -> terminal. – type “python” or “python -V”
pip installed. Pip is already installed if you already installed the Python. To check your pip installed or version, same thing to open terminal above, then type “pip -V”
2. Start Project
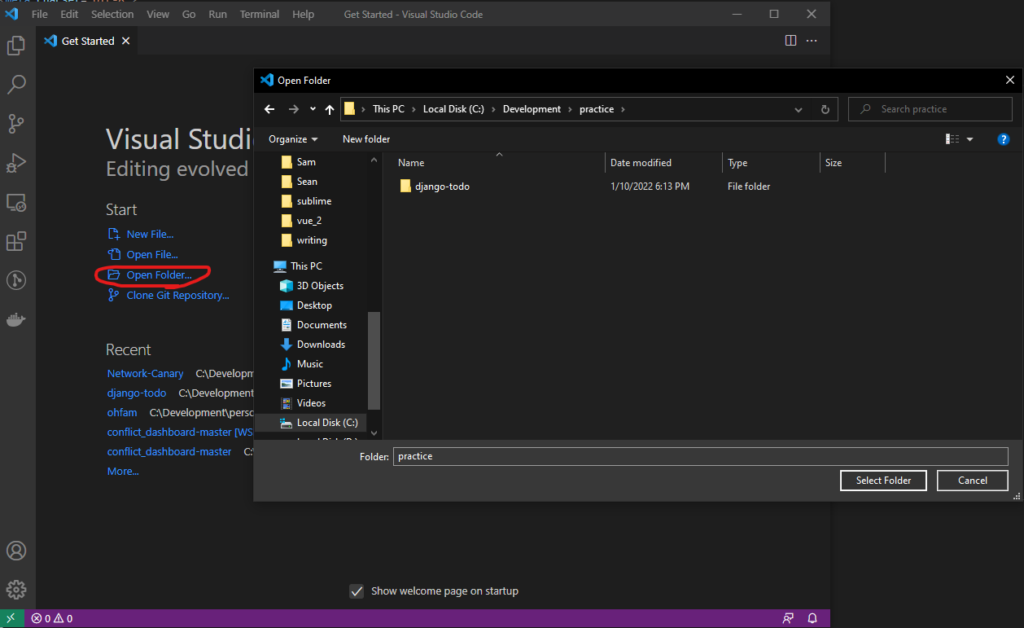
Create your project folder. For me, C:\Development\practice\django-todo
Open the VSCode and open the project folder by clicking “Open Folder”
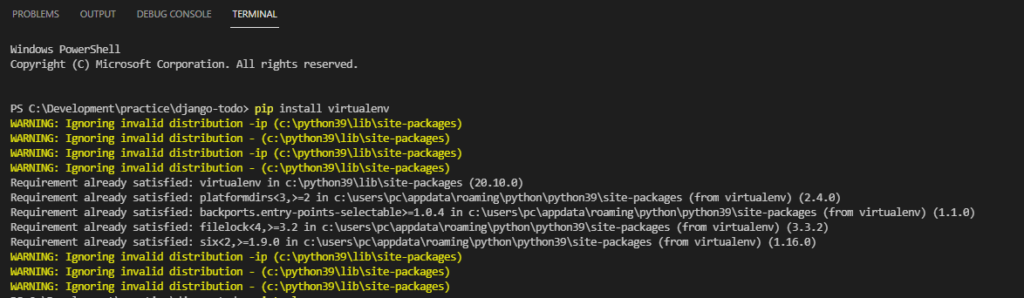
From hereafter, all the terminals of screenshots are the terminal on VSCode opened, and the terminal I used is Windows PowerShell.
Then create the virtual machine typing “virtualenv env”. you can change the name of virtual machine by changing “env” there, like, “virtualenv vm”, “virtualenv django” or etc. I haven’t tried to use two words like “django project”, but probably it would work if there is underscore like “django_project” something like that.
However, in my PowerShell, it was not working, so I googled it, and got answer using “python -m virtualenv env”
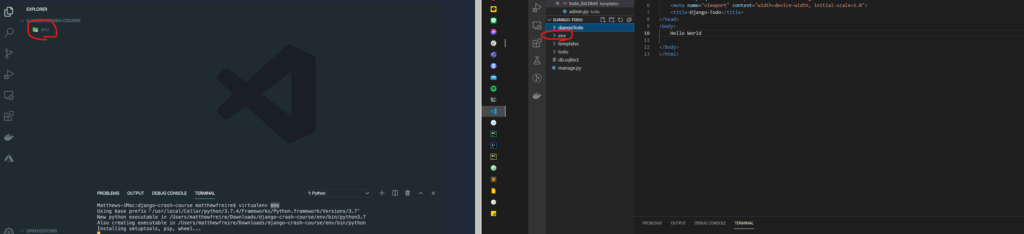
Then it will create the env folder on your explorer in VSCode.
left side of screenshot is from the video tutorial. used this because I proceed little steps already. right side is my local.use “python -m virtualenv env” instead just “virtualenv env” for my PowerShell
Now Activate the virtual machine typing “source env/scripts/activate”
however, again my PowerShell did not work.
I used “env/scripts/activate” to activate
If it is activated, you can see (env) in front of the folder path. or other names that you made with parentheses.
To deactivate the virtual machine, type “deactivate” in my case on PowerShell.
3. Start Django Project
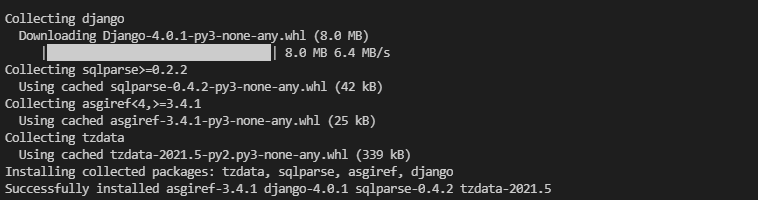
First, install django by typing “pip install django”
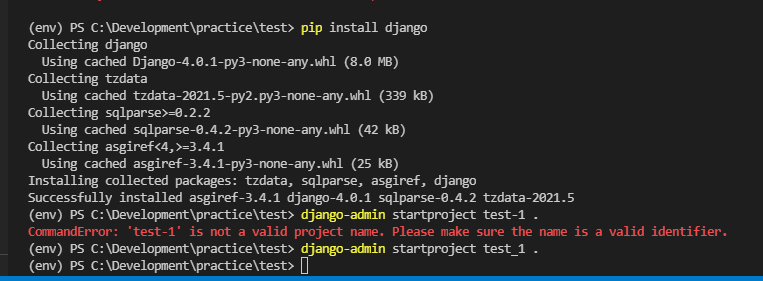
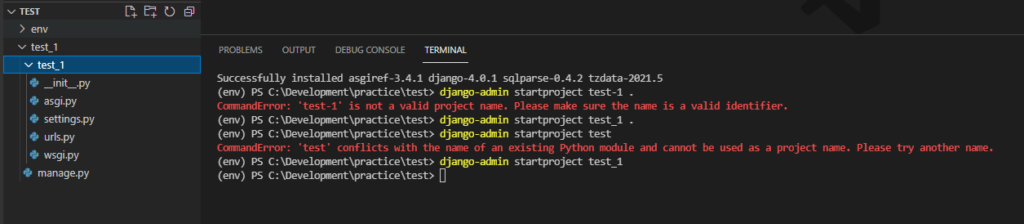
Now start Django project typing “django-admin startproject djangoTodo .” you can change your project name from djangoTodo to anything you want. However, I guess it does not allow dash”-“, but allows the underscore and number. see the screenshots below.
you can remove space and dot at the end of the command like this “django-admin startproject djangoTodo”, but then, it will create another same name of the folder
without using space and dotwith space and dot
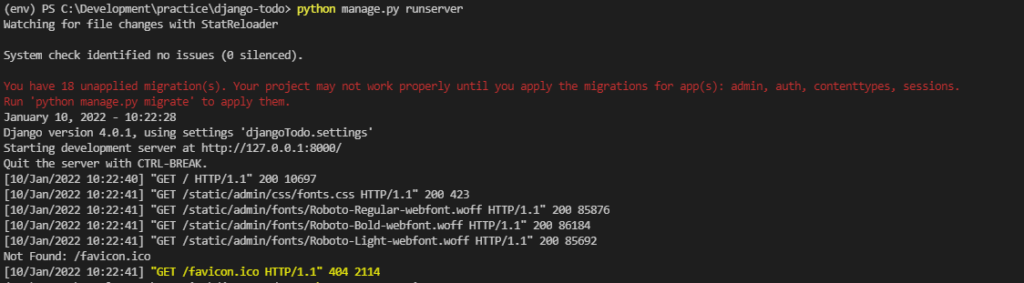
now run server typing “python manage.py runserver”
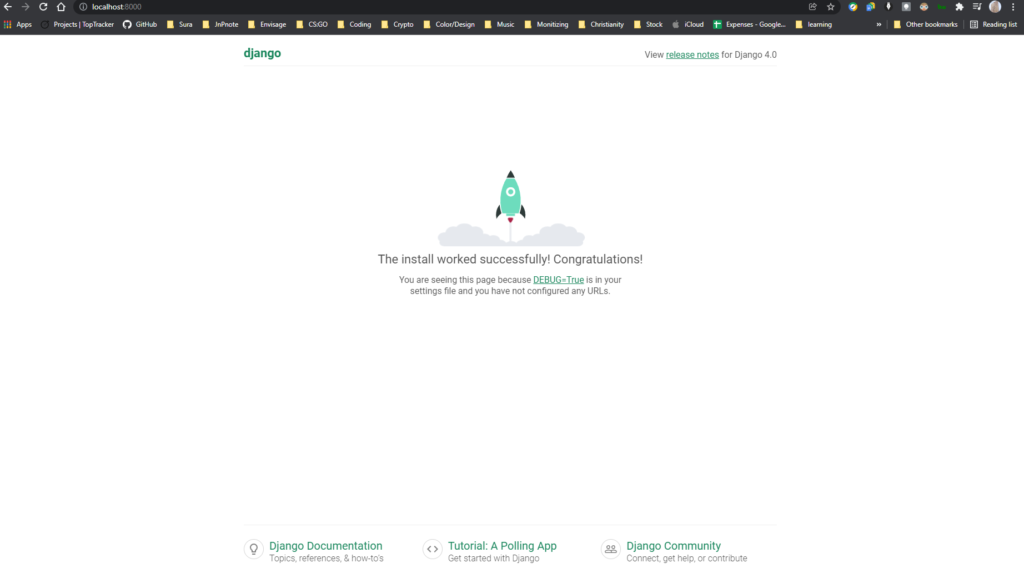
Now if you type “localhost:8000” on your browser, you will see the screen like screenshot below. Then, you are ready to code for your project.
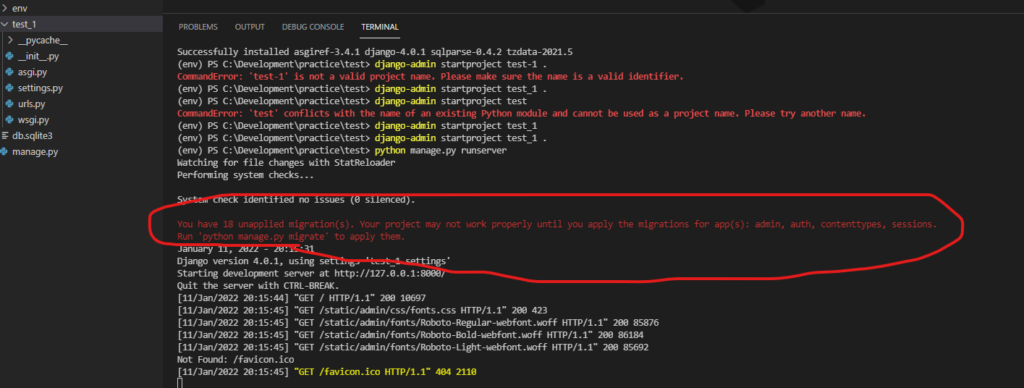
You might notice there were some errors when you run the server in previous step.
To remove them, quit the server by hit ctrl + c.
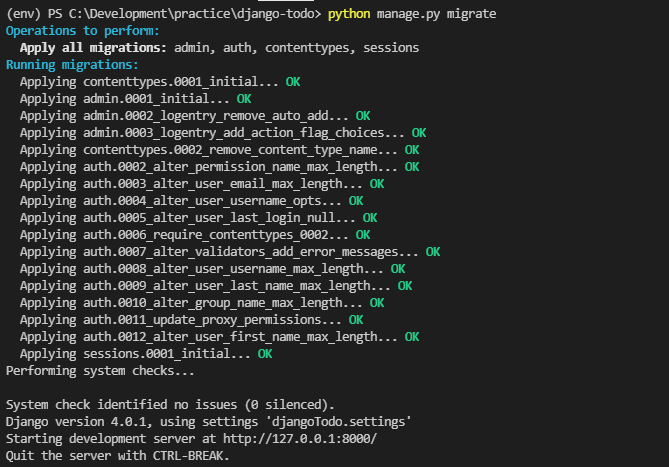
Type “python manage.py migrate”
Then you will see like below screenshot.
And type “python manage.py runserver” again to run the server.
Now no errors anymore.
I used two different name of project, djangoTodo and test_1. it is because I started the project first and start writing this blog for record and understand deeply myself, so I restarted the test one to do it over again. I will resume to the original project name djangoTodo in middle of next post.
I stopped here because the post is getting too long since I use screenshots a lot.


-Part4")