This post is for myself to remember how to build Django project. I did follow the tutorial from the JustDjango Learn website free tutorial. And this is the fourth tutorial named Getting Started With Django. I am not going over all the details and descriptions for each part. There are good explanations on video of the JustDjango Learn. So, visit their site and try their tutorials if you need more details. Also, the orders of this post and their video might be different because I put things first what I think should come first.
I am doing this on Windows 10 with just Windows PowerShell. Not using virtual machines at all.
you will be able to see two checkbox for “Is organisor” and “Is agent”
3. Agent’s UI
Agents don’t have to be able to see agent link on nav bar.
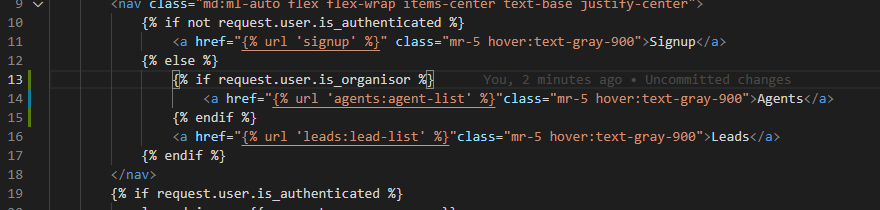
go to navbar.html and add if statement as below screenshot
go to admin page and create new user or change test user with user type as “Is agent”
go to leads or agent or home page and logout and login with test user
you will not see agent link on nav bar.
but still if you type agents link on address bar, you can see them.
To prevent this, you need to check whether user is organisor or not after login
to do this, we will create custom mixin
create mixins.py under agents app
write/copy code below
from django.contrib.auth.mixins import AccessMixin
from django.shortcuts import redirect

class OrganisorAndLoginRequiredMixin(AccessMixin):
	"""Verify that the current user is authenticated and is an organisor."""
	def dispatch(self, request, *args, **kwargs):
		if not request.user.is_authenticated or not request.user.is_organisor:
			return redirect("leads:lead-list")
		return super().dispatch(request, *args, **kwargs)
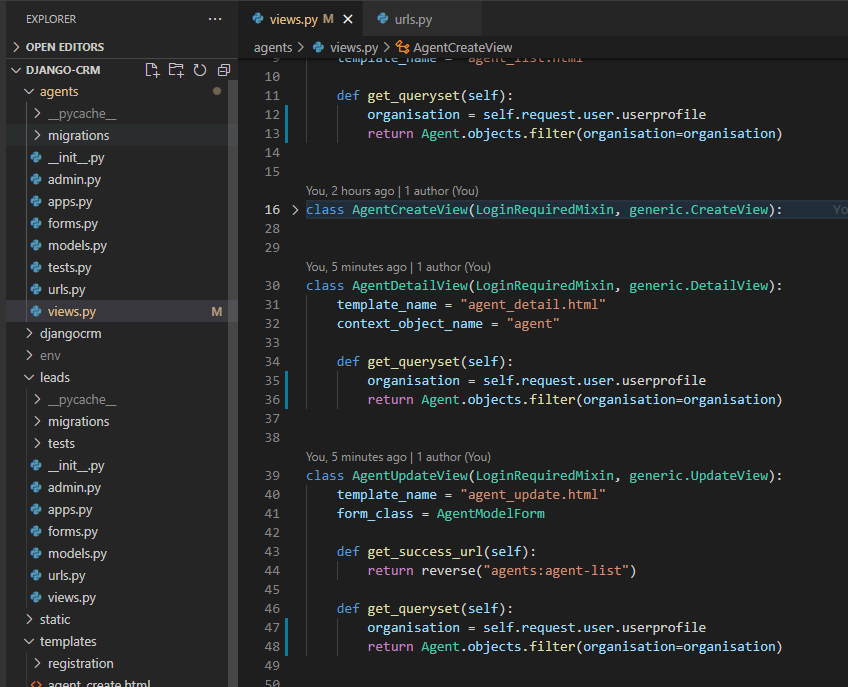
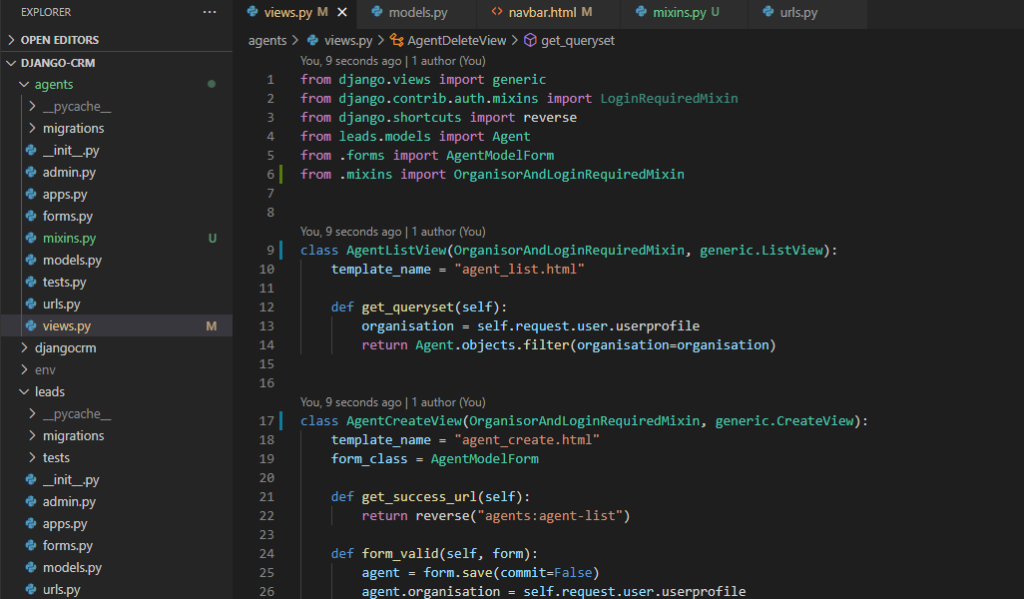
go to views.py
import OrganisorAndLoginRequiredMixin
replace all LoginRequiredMixin to OrganisorAndLoginRequiredMixin
go to browser and try to go to http://localhost:8000/agents/
you will be redirected to leads
now, for leads app too. you can leave agent be able to create, update, delete, but I will restrict agents to do those
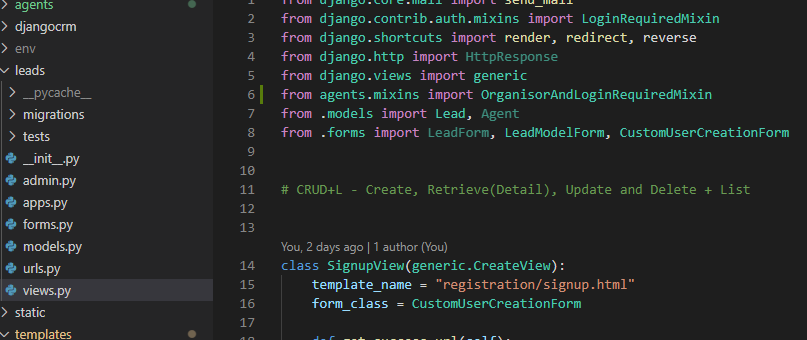
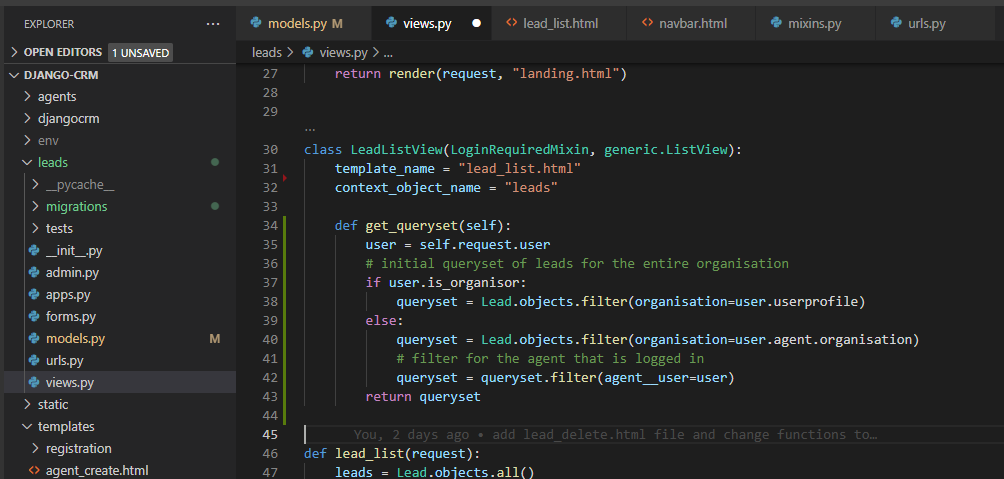
to do that, go to views.py under leads app
import OrganisorAndLoginRequiredMixin
replace some of LoginRequiredMixin that you want to restrict to OrganisorAndLoginRequiredMixin
I did for create, update and delete views
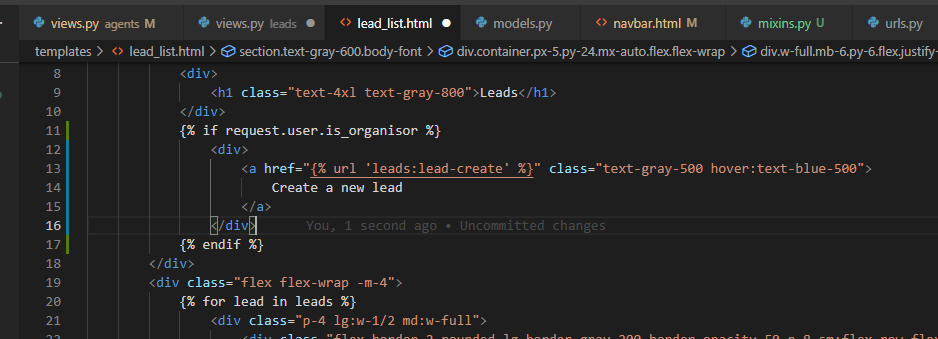
also, wanna hide the create new lead button on UI when agents logged in
go to lead_list.html and add if statement there for link
go to check if create link is disappeared
and try to type leads/create on address bar to force to direct
again, for description of what it does, please watch their videos
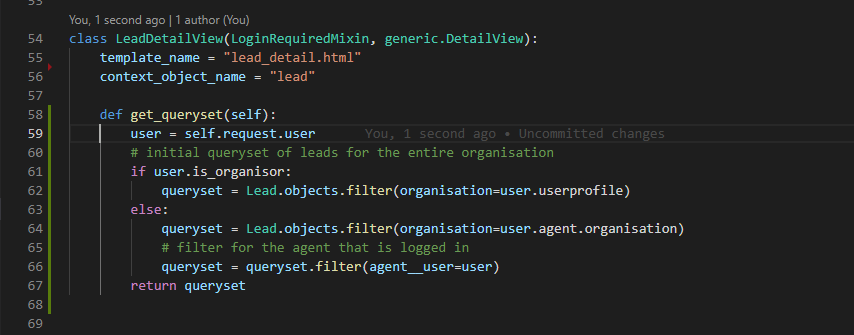
class LeadListView(LoginRequiredMixin, generic.ListView):
	template_name = "lead_list.html"
	context_object_name = "leads"

	def get_queryset(self):
		user = self.request.user
		# initial queryset of leads for the entire organisation
		if user.is_organisor:
			queryset = Lead.objects.filter(organisation=user.userprofile)
		else:
			queryset = Lead.objects.filter(organisation=user.agent.organisation)
			# filter for the agent that is logged in
			queryset = queryset.filter(agent__user=user)
		return queryset
do same for detailview
no need to edit create view
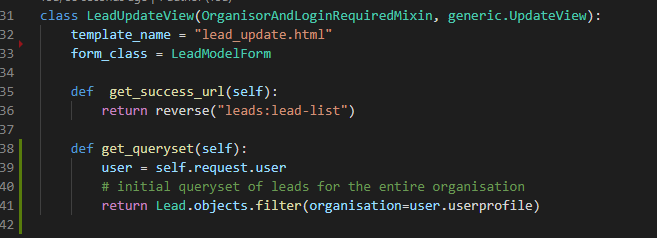
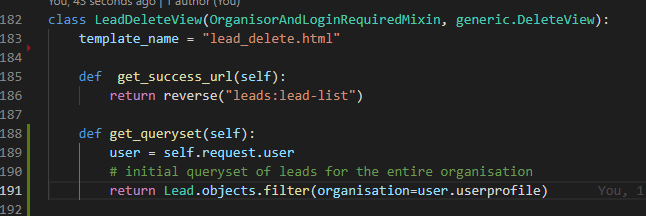
little different for update and delete views as below
def get_queryset(self):
		user = self.request.user
		# initial queryset of leads for the entire organisation
		return Lead.objects.filter(organisation=user.userprofile)
go to browser and create some test user, agents, leads
try to login with different users to test what you can see for each users.
6. invite agent
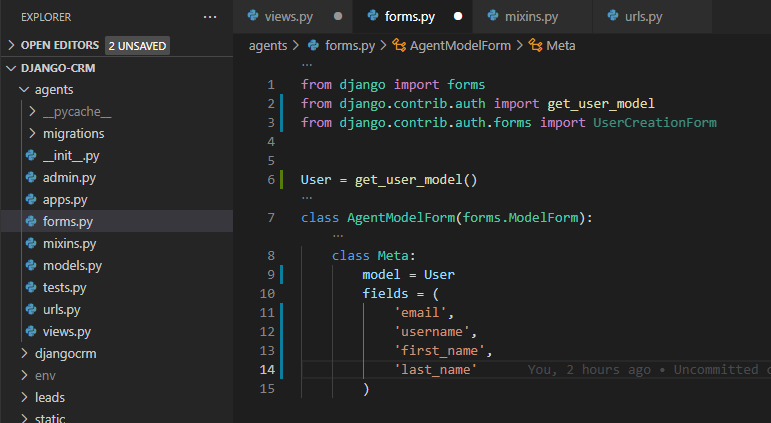
give some more fields for Agent
go to forms.py under agents app
edit like screenshot below
To send email for newly created agent
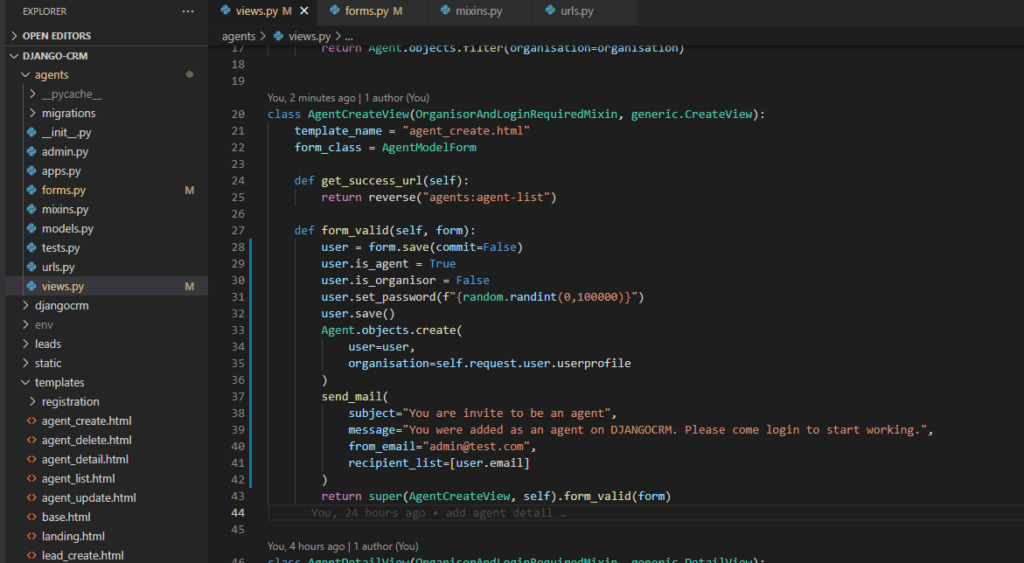
go to views.py
import random and send_mail
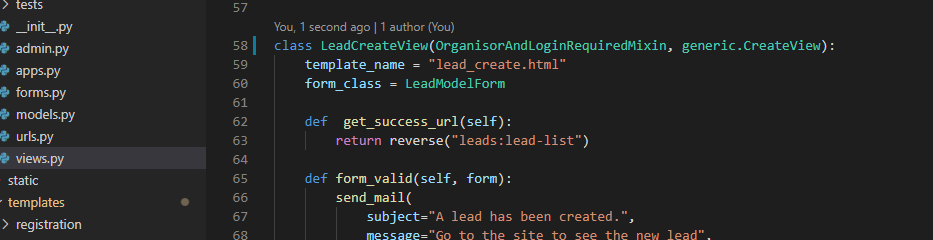
edit AgentCreateView as below code
class AgentCreateView(OrganisorAndLoginRequiredMixin, generic.CreateView):
	template_name = "agent_create.html"
	form_class = AgentModelForm

	def get_success_url(self):
		return reverse("agents:agent-list")

	def form_valid(self, form):
		user = form.save(commit=False)
		user.is_agent = True
		user.is_organisor = False
		user.set_password(f"{random.randint(0,100000)}")
		user.save()
		Agent.objects.create(
			user=user,
			organisation=self.request.user.userprofile
		)
		send_mail(
			subject="You are invite to be an agent",
			message="You were added as an agent on DJANGOCRM. Please come login to start working.",
			from_email="[email protected]",
			recipient_list=[user.email]
		)
		return super(AgentCreateView, self).form_valid(form)
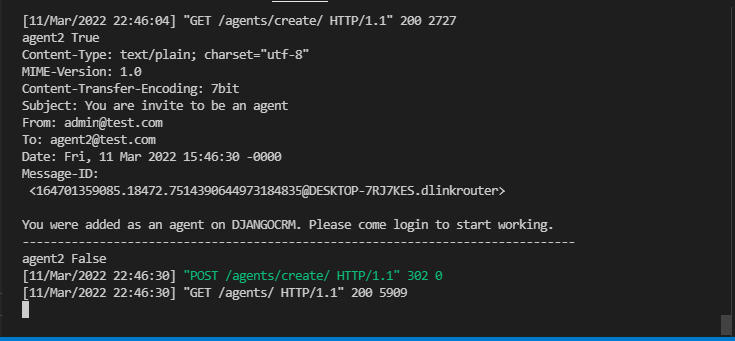
save the files and go to browser
test to create agent on site
you will see the email content on console after create new agent like below


-Part5")