This post is for myself to remember how to start the basic Django project. I did follow the tutorial from the JustDjango Learn website free tutorial. And this is the first tutorial named Django Crash Course. As previous parts, I am not going over all the details and descriptions for each part. There are good explanations on video of the JustDjango Learn. So, visit their site and try their tutorials if you need more details. Also, the orders of this post and their video might be different because I put things first what I think should come first.
1. Change the structure of urls work
It was working with base urls until last part.
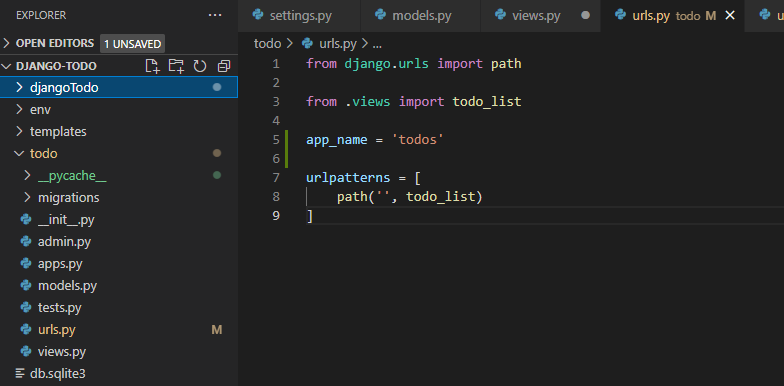
Create the new file name urls.py under todo folder.
Write or copy the code below.
from django.urls import path

from .views import todo_list

app_name = 'todos'

urlpatterns = [
	path('', todo_list)
]
Save the file.
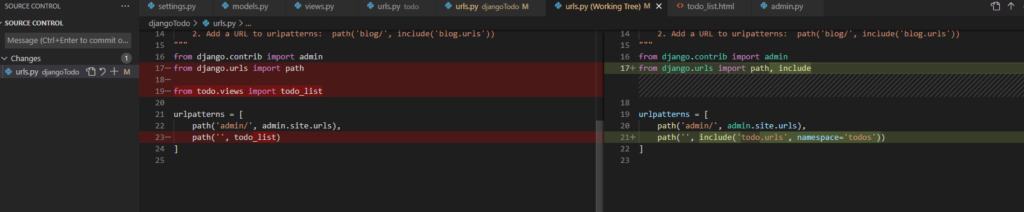
Go to base urls.py under your project folder. In my case, djangoTodo folder.
Edit them as the below code and save the file.
from django.contrib import admin
from django.urls import path, include

urlpatterns = [
    path('admin/', admin.site.urls),
	path('', include('todo.urls', namespace='todos'))
]
2. To get all of the todo objects
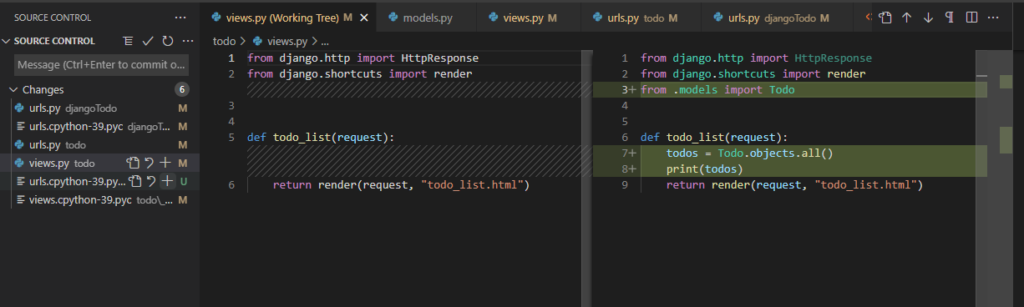
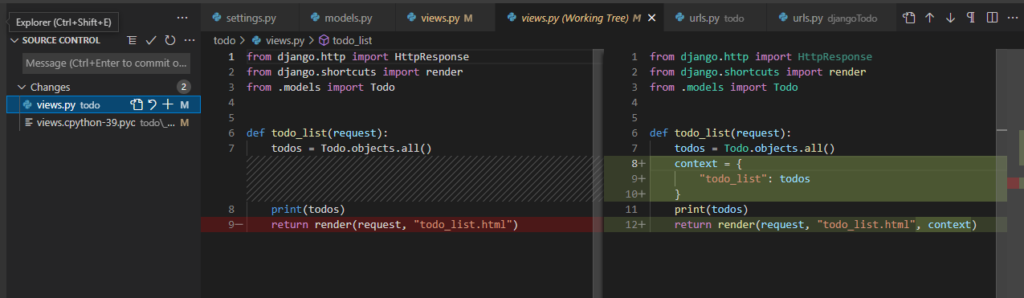
Go to views.py under todo folder.
Edit the code as below and save the file.
from django.http import HttpResponse
from django.shortcuts import render
from .models import Todo


def todo_list(request):
	todos = Todo.objects.all()
	print(todos)
	return render(request, "todo_list.html")
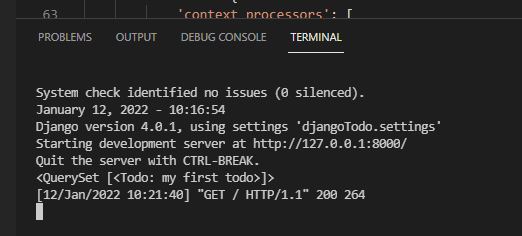
Go to browser and refresh the page.
Come back to VSCode and look at the terminal.
You will see like below.
<QuerySet [<Todo: my first todo>]>
[12/Jan/2022 10:21:40] "GET / HTTP/1.1" 200 264
3. Access todos inside the html files
Go to views.py under todo folder.
Edit the code like below.
from django.http import HttpResponse
from django.shortcuts import render
from .models import Todo


def todo_list(request):
	todos = Todo.objects.all()
	context = {
		"todo_list": todos
	}
	print(todos)
	return render(request, "todo_list.html", context)
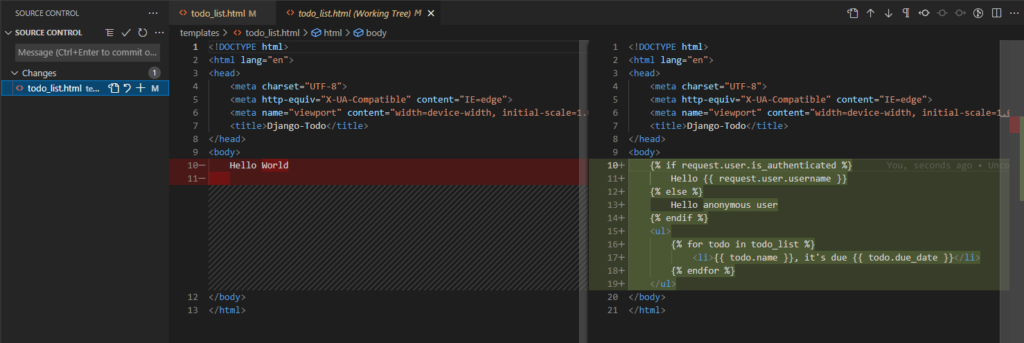
4. Edit Templates to show todo list and other info
Go to templates.html wherever you created.
Write or copy the code below adding on the body.
	{% if request.user.is_authenticated %}
		Hello {{ request.user.username }}
	{% else %}
		Hello anonymous user
	{% endif %}
	<ul>
		{% for todo in todo_list %}
			<li>{{ todo.name }}, it's due {{ todo.due_date }}</li>
		{% endfor %}
	</ul>
Save the file.
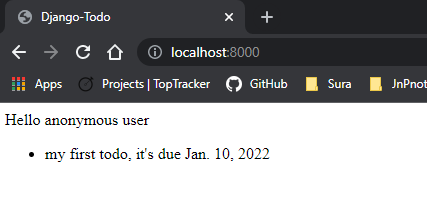
Refresh the browser then you will see your todo list you created.
I will stop here for this post because from the next tutorial it is about CRUD. And I think it would be better to have in one separate post for that part.

-Part2")